Replace a node from a remote backup
Follow this procedure to restore a single Cassandra node from a total loss of all data where the replacement node has a different IP address from the original.
NOTE: Restoring a node from a total loss can only be performed from a remote backup.
AxonOps identifies nodes by a unique host ID which is assigned when the agent starts up. In order to restore a backup to a node with a different IP address you must manually assign the AxonOps host ID of the old node to its new replacement.
You can find the host ID of the old node on the Cluster Overview page of the AxonOps Dashboard.
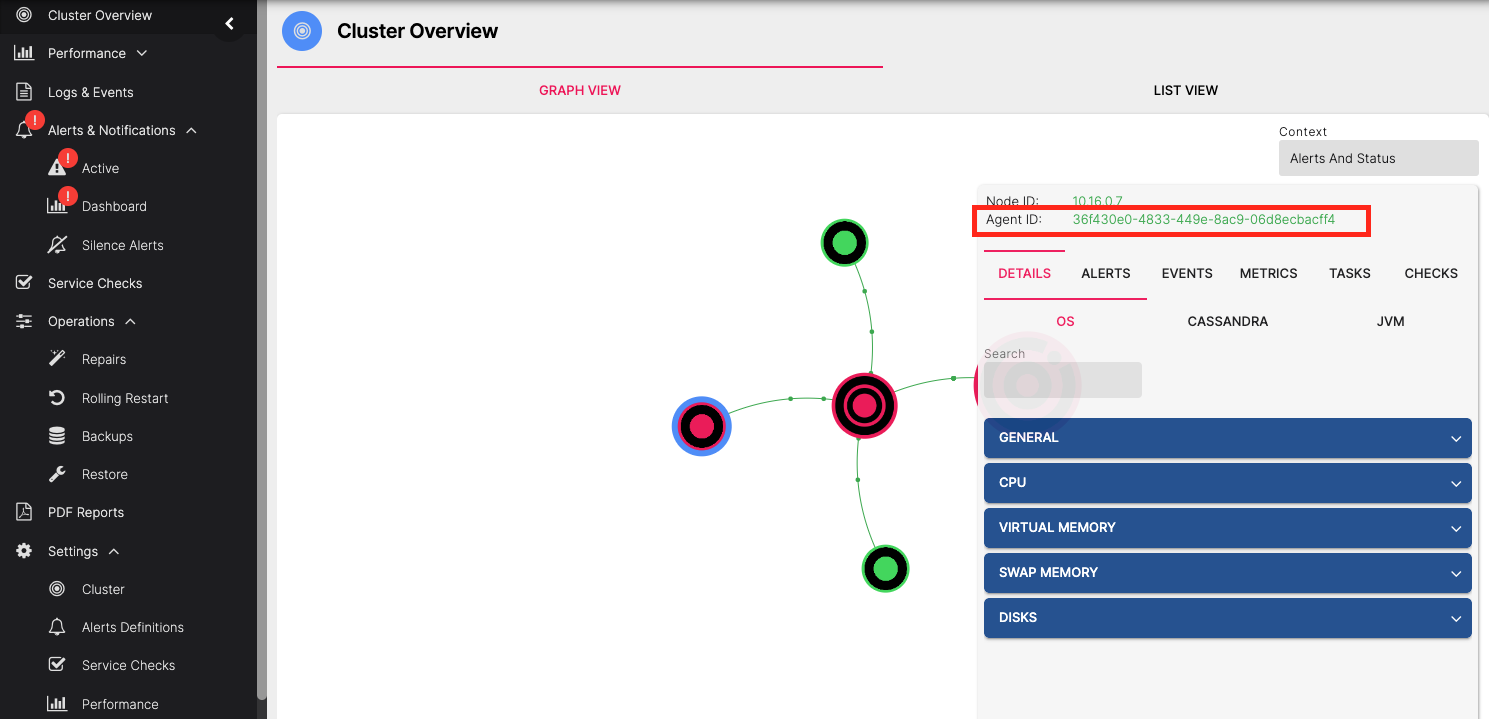
If you still have access to the old server or its data then its host ID can also be found in the file /var/lib/axonops/hostId
Manually configure the axon-agent host ID
Ensure axon-agent is stopped and clear any data that it may have created on startup.
sudo systemctl stop axon-agent
sudo rm -rf /var/lib/axonops/*
Manually apply the old node's host ID on the replacement (replace the host ID shown with your host ID from the previous steps).
echo '24d0cbf9-3b5a-11ed-8433-16b3c6a7bcc5' | sudo tee /var/lib/axonops/hostId
sudo chown axonops.axonops /var/lib/axonops/hostId
Start axon-agent.
sudo systemctl start axon-agent
Restore a backup to the replacement node
Ensure Cassandra is stopped on the new node and that its data directories are all empty.
sudo systemctl stop cassandra
sudo rm -rf /var/lib/cassandra/commitlog/* /var/lib/cassandra/data/* /var/lib/cassandra/hints/* /var/lib/cassandra/saved_caches/*
Allow axonops user to write to the Cassandra data directory.
sudo chmod -R g+w /var/lib/cassandra/data
These commands assume you are storing the Cassandra data in the default location
/var/lib/cassandra/. Update the paths if your data is stored elsewhere. If yourcassandra.yamllists more than one entry underdata_file_directories, run therm,chmodandchowncommands against every configured data directory.
Now open the Restore page in the AxonOps Dashboard by going to Operations > Restore
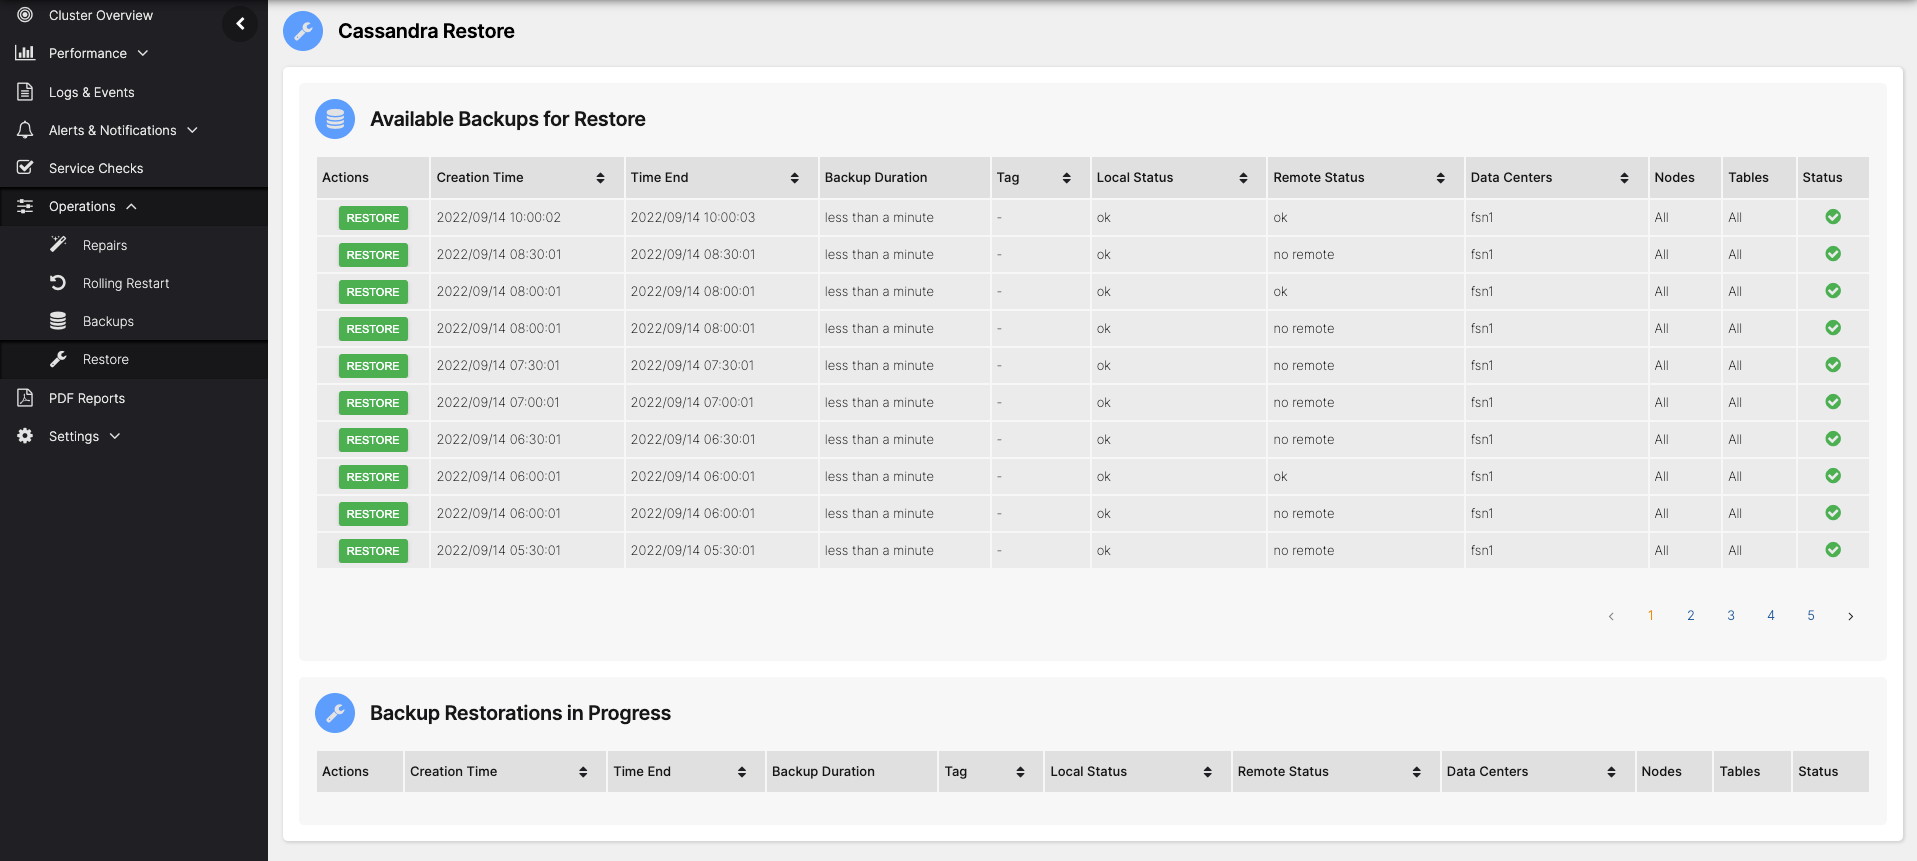
Choose the backup you wish to restore from the list and click the RESTORE button.
This will show the details of the backup and allow you to restore to all nodes or a subset using the checkboxes in the Nodes list.
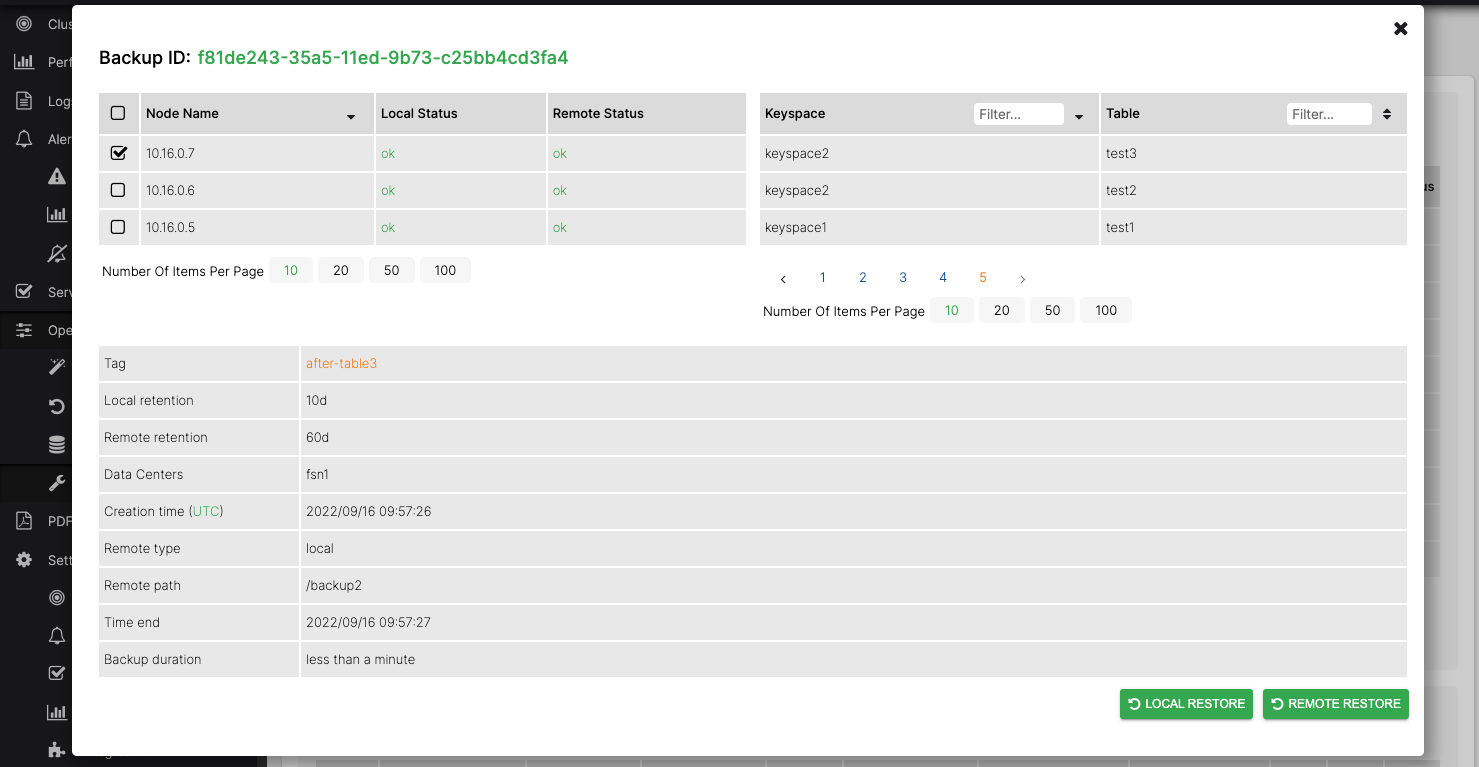
Ensure only the node you wish to restore is selected in the checkbox list and start the restore by clicking the
REMOTE RESTORE button.
The restore progress will be displayed in the Backup Restorations in Progress list.

After the restore has completed successfully, fix the ownership and permissions on the Cassandra data directories.
sudo chown -R cassandra.cassandra /var/lib/cassandra/data
sudo chmod -R g-w /var/lib/cassandra/data
Start Cassandra on the restored node.
sudo systemctl start cassandra
After the replacement node has started, the old IP address may still be visible in Gossip. It should clear out automatically after a day or two, or you can perform a rolling restart of the cluster to make sure everything is up-to-date.