Introduction
AxonOps is the only solution for the one-stop operation of Apache Cassandra®. Built by Cassandra experts and underpinned by a secure and efficient bi-directional protocol, it combines the essential functionality to enable Site Reliability Engineering to observe, maintain and protect their clusters. Key features include pre-configured dashboards, alerting with enterprise integration, performance-adaptive repairs and highly configurable backups with fine-grained retention management.
This blog looks at monitoring Cassandra on Kubernetes with AxonOps. Cassandra is still primarily run on bare metal or virtual machines. As more companies migrate to Kubernetes (and cloud providers) they are also moving some of the database servers such as Cassandra into Kubernetes. Kubernetes presents several additional challenges and that’s why we are adding support for Kubernetes to our AxonOps products.
K8ssandra
k8ssandra is a Kubernetes Operator for running Apache Cassandra®. With K8ssandra you can quickly deploy and run Apache Cassandra® and by default, it would add grafana and prometheus for monitoring. I’ll show you below how to use AxonOps instead for richer and more complete Cassandra observability.
Getting Started
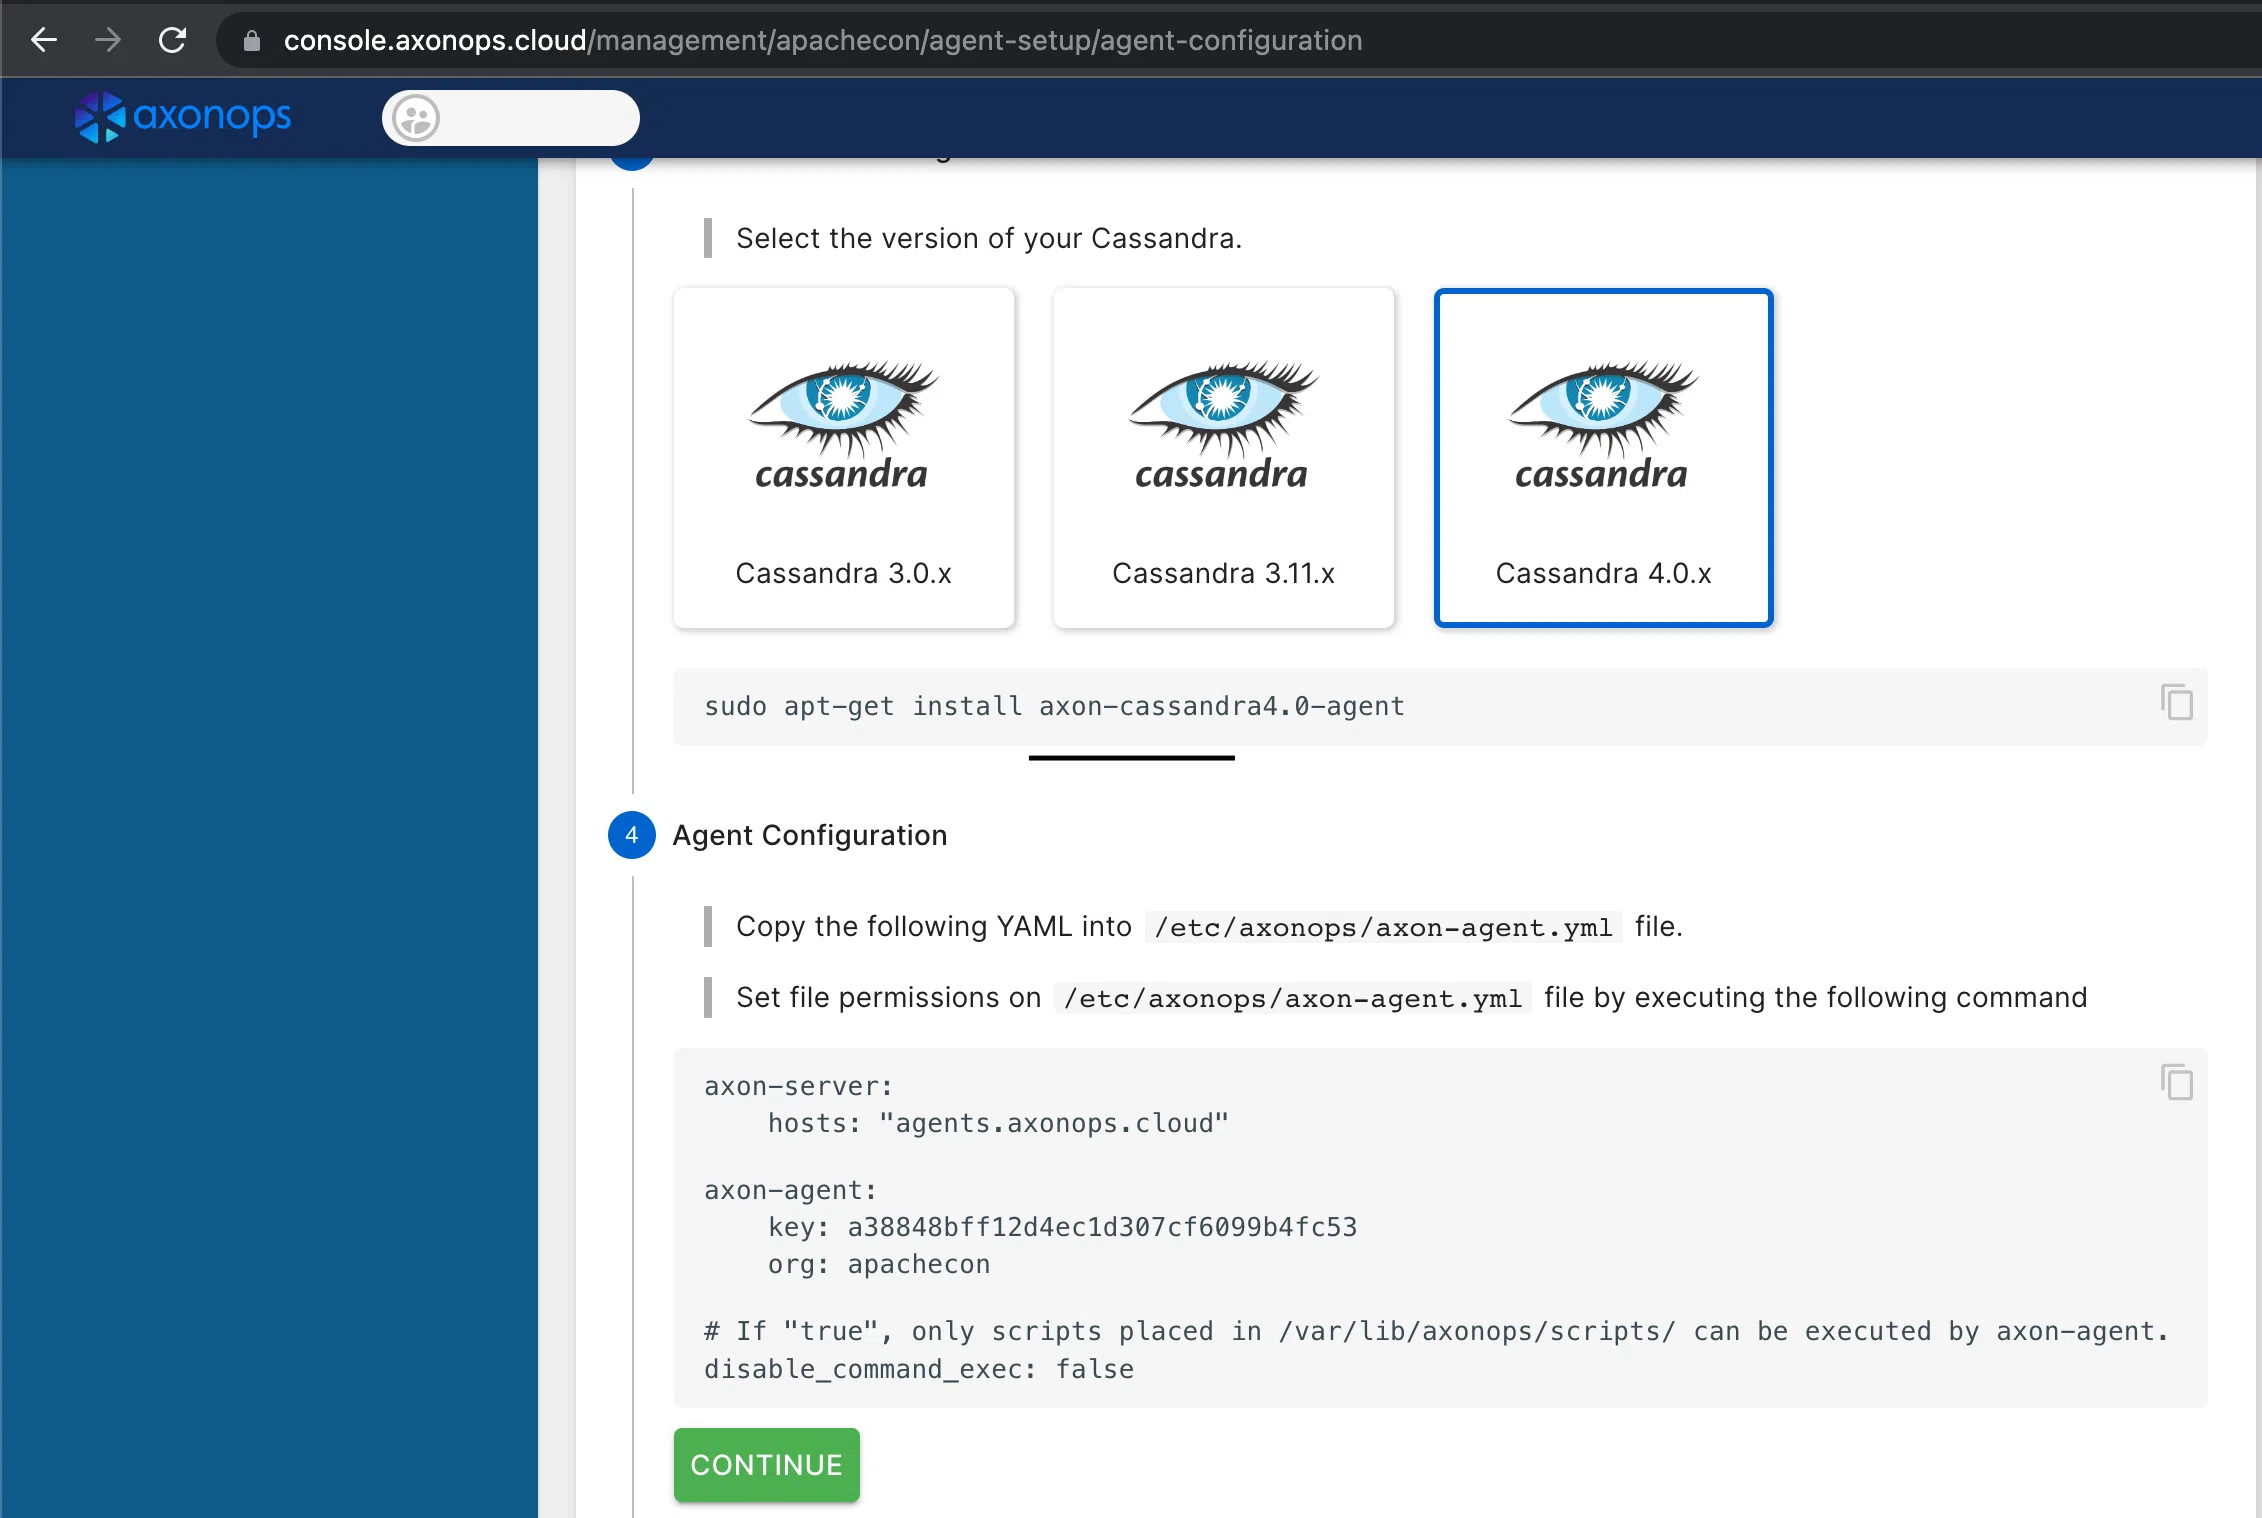
Before you start, get onto https://axonops.com and sign up for a Free Plan. Then, if you browse to the AxonOps console you should be able to grab a copy of the agent’s config file you’ll require for the next step.
Install k8ssandra operator
The k8ssandra-operator is very easy to install from helm charts. It requires cert-manager as well, if you don’t have it yet, remember to install it first. The example below uses a helmfile to install both k8ssandra-operator and cert-manager.
---
repositories:
  - name: jetstack
    url: https://charts.jetstack.io
  - name: k8ssandra
    url: https://helm.k8ssandra.io/
releases:
  - name: cert-manager
    namespace: kube-system
    wait: true
    waitForJobs: true
    chart: jetstack/cert-manager
    values:
      - installCRDs: true
  - name: k8ssandra
    namespace: k8ssandra
    chart: "k8ssandra/k8ssandra-operator"
    wait: true
    values:
      - global:
          clusterScoped: true
Then save this as helmfile.yaml then just do:
~$ helmfile syncAxonOps Agent
Take the AxonOps Agent config you previously obtained from the AxonOps console and convert it into a configmap to be mounted into the pods:
Make sure you have an active plan enabled on the AxonOps Console. You can get a Free Plan that allows you to connect up to 5 nodes.
Apache Cassandra Cluster
The sample config below should work on minikube but you should obviously adjust memory, CPU and disk settings according to your set-up. Make sure (if using minikube) that there are enough memory and CPU resources available.
I’m using a MacBook to run minikube and these are the options I require. You may need slightly different arguments depending on whether you use Mac, Windows or Linux.
---
apiVersion: cassandra.datastax.com/v1beta1
kind: CassandraDatacenter
metadata:
  name: axonops
  namespace: axonops
spec:
  clusterName: axonops-test
  serverType: cassandra
  serverVersion: "4.0.8"
  managementApiAuth:
    insecure: {}
  size: 3
  podTemplateSpec:
    spec:
      initContainers:
        - name: axonops-init
          image: busybox:1.34.1
          command: ['sh', '-c', 'cp /etc/axonops/axon-agent.yml /var/lib/axonops/axon-agent.yml']
          env:
            - name: AXON_SHARED_VOLUME
              value: /var/lib/axonops
          volumeMounts:
            - name: axonops-agent-config
              mountPath: /etc/axonops
            - name: axonops-shared
              mountPath: /var/lib/axonops
          resources:
            requests:
              memory: 256Mi
              cpu: 100m
            limits:
              memory: 512Mi
              cpu: 500m
      containers:
        - name: "axon-agent"
          image: europe-docker.pkg.dev/axonops-public/axonops-docker/axon-agent:latest
          imagePullPolicy: Always
          volumeMounts:
            - name: axonops-agent-config
              mountPath: /etc/axonops
            - name: axonops-shared
              mountPath: /var/lib/axonops
              readOnly: false
            - name: axonops-logs
              mountPath: /var/log/axonops
            - name: server-logs
              mountPath: /opt/cassandra/logs
          resources:
            requests:
              memory: 256Mi
              cpu: 10m
            limits:
              memory: 512Mi
              cpu: 20m
      volumes:
        - name: axonops-agent-config
          configMap:
            name: axonops-agent-config
        - name: axonops-shared
          emptyDir: {}
        - name: axonops-logs
          emptyDir: {}
        - name: cassandra-logs
          emptyDir: {}
  cassandra:
    kube-prometheus-stack:
      enabled: false
    prometheus:
      enabled: false
    grafana:
      enabled: false
    resources:
      requests:
        memory: 700Mi
        cpu: 500m
      limits:
        memory: 2Gi
        cpu: 2
  reaper:
    enabled: false
  stargate:
    enabled: false
  storageConfig:
    cassandraDataVolumeClaimSpec:
      storageClassName: local-path
      accessModes:
        - ReadWriteOnce
      resources:
        requests:
          storage: 50Gi
    additionalVolumes:
      - name: axonops-shared
        mountPath: /var/lib/axonops
        pvcSpec:
          storageClassName: local-path
          accessModes:
            - ReadWriteOnce
          resources:
            requests:
              storage: 100Mi
      - name: axonops-logs
        mountPath: /var/log/axonops
        pvcSpec:
          storageClassName: local-path
          accessModes:
            - ReadWriteOnce
          resources:
            requests:
              storage: 500Mi
      - mountPath: /opt/cassandra/logs
        name: server-logs
        pvcSpec:
          storageClassName: local-path
          accessModes:
            - ReadWriteOnce
          resources:
            requests:
              storage: 1Gi
  config:
    cassandra-yaml:
      authenticator: org.apache.cassandra.auth.PasswordAuthenticator
      authorizer: org.apache.cassandra.auth.CassandraAuthorizer
      role_manager: org.apache.cassandra.auth.CassandraRoleManager
      num_tokens: 8
      max_hints_file_size_in_mb: 128
      disk_optimization_strategy: ssd
    jvm-server-options:
      initial_heap_size: "800M"
      max_heap_size: "800M"
      additional-jvm-opts:
        - "-javaagent:/var/lib/axonops/axon-cassandra4.0-agent-1.0.8.jar=/var/lib/axonops/axon-agent.yml"
Storage Class
Please pay special attention to the storage class for the storage. If you’re running it locally (lab environment like minikube) you use either the standard k8s.io/minikube-hostpath or install instead the rancher.io/local-path provisioned. On cloud environments running managed Kubernetes such as AWS or Google, you can usually leave the storageClassName empty to use the default configuration.
Note: I’ve encountered a bug on the minikube storage provisioner when starting multiple nodes. You may want to use the rancher’s provisioner instead which does work as expected.
Config
The configuration below deploys an Apache Cassandra cluster using a k8ssandra resource definition. You can find some examples on the k8ssandra.io website. The important parts for adding AxonOps to the cluster are:
- initContainer: this is used to deploy the AxonOps Agent configuration to the Cassandra pods
- volumes and volumeMounts: the AxonOps Agent requires access to the Apache Cassandra logs and they also need to share a volume where the network socket and configuration are hosted.
- axon-agent: there is an additional container added to the pod running the AxonOps Agent.
jvmOptions: we’re injecting the AxonOps Agent as a javaagent to Apache Cassandra
Running
Once you have saved this configuration to a file, you only need to apply it. Remember to create the namespace first, if it does not exist already.
~$ kubectl create ns axonopsIf everything worked, you should be able to list the running Cassandra pods:
NAME                                 READY   STATUS    RESTARTS   AGE
axonops-test-axonops-default-sts-0   3/3     Running   0          30m
axonops-test-axonops-default-sts-1   3/3     Running   0          20m
axonops-test-axonops-default-sts-2   3/3     Running   0          10m
As they get bootstrapped, they will start appearing in the AxonOps Dashboard. You are now ready to start monitoring Cassandra on Kubernetes with AxonOps!
Should you have any questions or would like to speak to a Cassandra Expert, please get in touch.
About the Author
Sergio Rua is a Principal DevOps specialist at Digitalis.io and AxonOps working with many customers managing and advising on Kubernetes, Kafka, Cassandra, Elasticsearch and other cool technologies.